
When people think about taking a trip to Israel, they rarely think of packing their hiking boots. There’s an endless list of amazing hikes in Mitzpe Ramon, Israel, however, I am just narrowing it down to top three. I know I didn’t so my feet had to suffer the consequences. They were sorely unprepared for the onslaughter of rocks and uneven surfaces they had to endure.
Two months ago my boyfriend and I took a 3-week road trip across Israel…
We are both avid travellers (about 35+ countries each) but this was the one trip we were both beyond excited about. Neither of us was disappointed! So stay tuned for further blogs post about our Israel holiday.
Mitzpe Ramon is known as the largest crater of its kind. It was not created from asteroid impact but a large “hole” dug out by natural erosions. The area is classified as a National park in Israel and it is also the biggest.
Read on for 3 amazing hikes you should NOT miss while travelling in Mitzpe Ramon:
Attention: All the stuff written below are from my personal experience, however, please refer to local officials for updates or more in-depth information in regards to the routes. I would consider myself mediocre fitness level, so keep that in mind while planning your trip!
We arrived in the afternoon right around check-in time. Although we were both exhausted, we were both very excited to start exploring the crater and it’s surrounding area. We set out right after checking in for a short hike as we were told there’s no better way to see all the different landscapes the area had to offer.
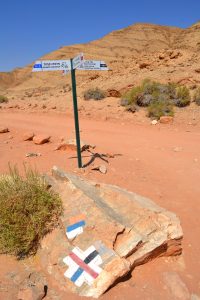
In Israel, the trials are always marked with different coloured markers. Keep your eyes out for them! Usually, you are able to see the next set of markers up ahead. It can be placed on anything from huge boulders to small rocks on the ground! They will also be painted towards a certain direction. If it points left: Turn left!
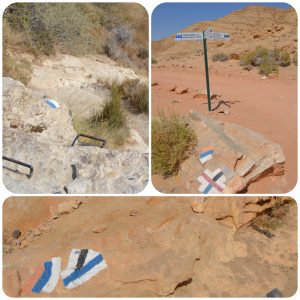 Different marker examples. Different colours and directions. Always follow where it points!
* Note: orange, blue and white is the National Israel trail marker!
Hike #1: Hemet Cistern loop
Perfect for none hikers looking for a short easy hike with a view of flat plains, crater and canyons.
Difficulty: Easy | Length: 14KM | Duration: Officials say 4-5hrs. It took us 2hrs.
For directions please refer to the official site or check out their information centre.
This is a beautiful and easy hike with a breathtaking view of the crater that suddenly appears in front of you. According to the Negev trials guide, you can take a dip in the cistern right beside the parking however it wasn’t actually possible. No need to bring your bathing suits!
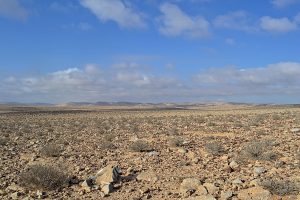
To start the hike, follow along with the green markers. You will walk across on the plain for quite a while. Both the grandness and flatness of the plains really took our breaths away. It’s so rare for us to be walking along such flatlands, our minds started to imagine a heart-stopping experience. At just a short walk away from our car and road, we felt like we were in the middle of a desert. We can easily imagine being lost (like in the movies) where mirages beginning to form in our minds.
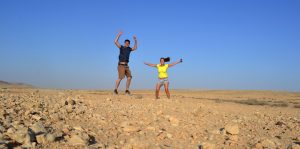 Our failed attempt jumping on the flatlands that we were walking along.
The trail eventually takes you to a small canyon where you descend in. Once you are in the canyon the trail markers changes to blue. Follow it up the canyon. You will start to gradually climb up to where you are…
…awarded with the view of the Mitzep Ramon crater.
When we were there, the sun was about to set so it gets quite chilly. Especially since it was nearly always winding whenever we are near the edge of the crater!
The amazing crater view of Mitzpe Ramon.
We really wanted to keep walking along the crater since we assumed the views will be spectacular however the sun was starting to set and we were in no way prepare to be out in the elements.
To head back: Return to the blue trail and head down the canyon. You will reach a meeting point with the green trail but stay on the blue! Apparently, along the way, you will see beautiful Pistacia trees, hidden rock puddles and some Bedouin caches however we didn’t really see much of any of them.
 The pretty canyon on the way back to our car.
Still a really nice walk back nevertheless. Keep on following the blue markers, you will start climbing out of the canyon and turn back to the parking lot.
As the sun started setting, it got so cold, I semi trailed ran back to the car!
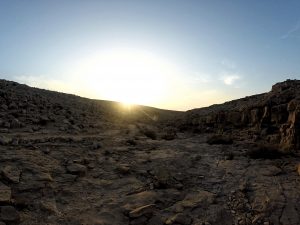 Sunset behind the hills during the hike.
Hike #2: Horseshoe (Wadi Ardon)
Perfect for fit hikers looking for relatively easy (but exhausting) hike with a view of large canyons, white limestones, Wadi Ardon (desert) and Acacia tree.
Difficulty: Easy – Medium | Length: 9.5KM | Duration: 4-5hrs.
For directions please refer to the official site or check out their information centre.
This hike took as long as the official suggested time because we got lost quite a few times. The use of the markers is great however it can be confusing at times especially when an actual sign points us directly up a hill with no path! So keep in mind, follow the markers and not the random sign postings.
 Sign towards no path.
I was quite tired and hot so I took a lot more breaks than I normally would. I was also getting extremely frustrated with the large black flies that like to land on my face!
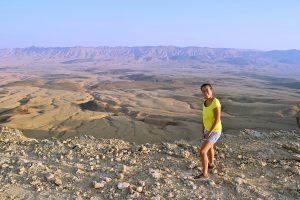
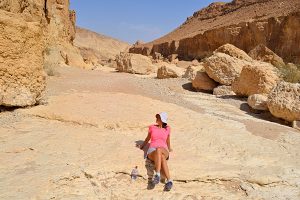 Me sitting down and resting while enjoying spectacular views!
To start the hike, follow the Green markers for about 1.5 until you reach an old ruin of the old Caravan stop:
One of many along the route from Petra to Gaza.
Take a quick look at the ruins then go straight through it up a tiny sloop where you will stop the blue markers. Make sure to follow the ones on the east (towards the left) and not the ones heading west which will be an uneventful walk back to a parking lot.
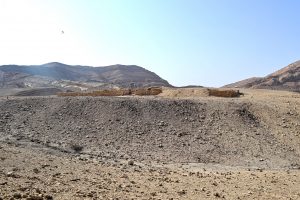 Ruins on top of the hill you must pass through.
Continue walking East along the markets into Horseshoe Canyon. It is a larger canyon than the first hike. You will walk through a narrow pass where the drainage of the crater exits to the cliffs.
From here you will find black markers and markets of Israel trail on your right. Continue following the blue and stay in the Canyon. Continue for about another 1.5km. You will find yourself surrounded by white hard limestone that’s polished by the flow of water during the occasional floods.
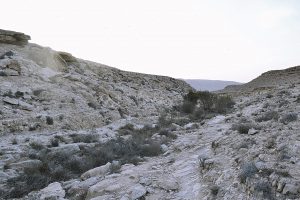
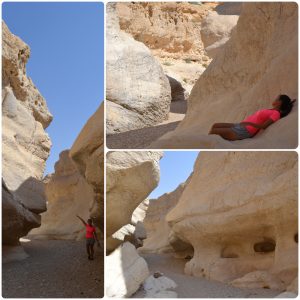 Beautiful picturesque white limestone path.
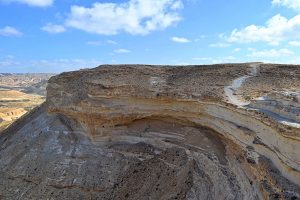
You are still following the blue markers, passing green markers on your left. You will reach an intersection of trials. Start following the black jeep trial heading NorthEast. Stay on the Black Markers as you enter Wadi Ardon, slowly curving Northwest. After a little over 1km, you will see the impress Magmatic intrusion into the horizontal layers of Wadi Ardon. It is really magnificent and different from any landscapes you’ve seen so far.
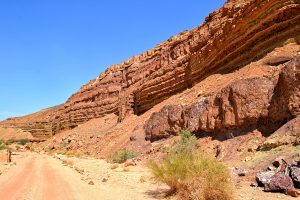 Pretty layers walking thru Wadi Ardon.
In about 200 meters, you will see red markets on your right. Follow these markers out of the wadi and up Harut Hill. Once you reach the base of the hill you can take a moment to assess how fatigued you are. It is a short but steep climb to the top but it is worth the view.
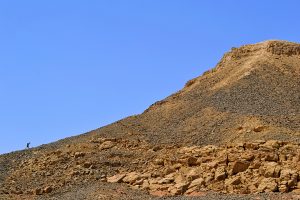 The steep sloop of Harut Hill. Notice: Man vs. Hill who will win?!
 Once you’ve made it to the top, it’s well worth the view.
To head back, follow the blue markers at the base of the hill back to the Wadi. You will pass the impress Acacia tree. After taking a short break, follow the black dirt road on the right and back up to the parking lot.
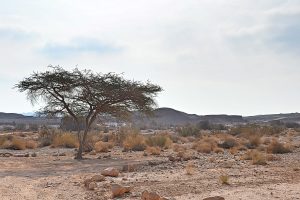 Old Acacia tree in the dry desert.
Hike #3: Ein Akev (Loop)
Perfect for fit hikers looking for a day hike with the breathtaking view of the cliff (Avdat Canyon/Havarim Canyon), Bedouin camp, Akev Wadi and a swim in natural spring.
Difficulty: Medium | Length: 13KM | Duration: 6hrs.
For directions please refer to the official site or check out their information centre.
I saved the best for last. This was our personal favourite hike we did while in Israel. It was a truly beautiful hike with a lot of changes in the landscape. We saw a completely different type of rocks and cliffs on this hike. However, it has literally no shade and gets extremely hot therefore feels really long. The last 6km is also just following a jeep road which can get very boring and repetitive.
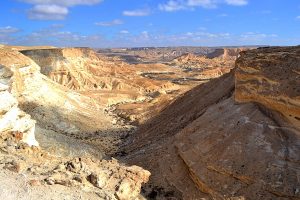 The surreal view of the valley.
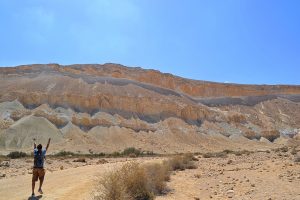
From the parking lot, you must head back (west) to the green markers on your left. Follow them to the end of the cliff. Mentally prepare yourself for the complete uphill climb on the steep slope. But fear not, it took us about 15-20mins so it isn’t a very long climb. However:
This is also the only physically challenging part of the hike.
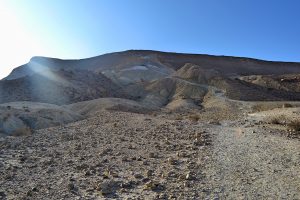 The super steep hill that doesn’t look as steep in this photo as it did in real life!
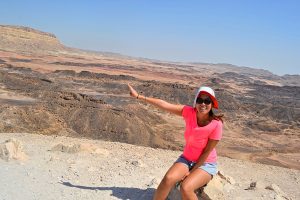
Once you make it to the top, you are rewarded with a thrilling view of Zin Valley where the two canyons meet.
 The view from the top of the hill
When you are ready, follow the green trail along the cliff for a bit. Walk across the flat plains for a while where you will eventually walk across Divshon where you will find a Bedouin camp.
 Surreal flat land that appears to go on forever.
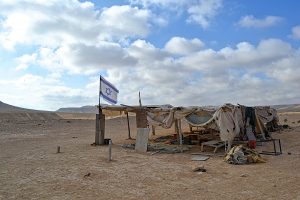 Bedouin camp with food place where you can buy food and drinks!
Follow the green marker down a small gully. Follow for about another 2km where you will start noticing changes in the landscape. You will notice yourself surround by white “rocks/boulders”. The surface flakes off upon your touch. I have no idea why it does but it’s super cool! You see people (including us) making markings and drawings on it!
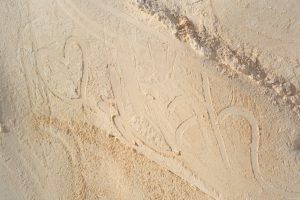
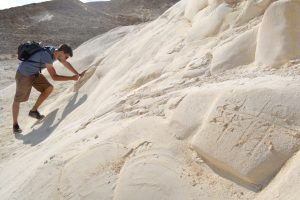 Soft stone surface that flakes off
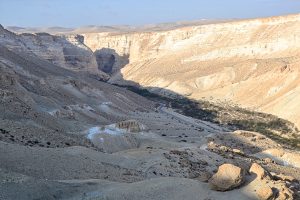
You will reach a narrow ledge where you continue for another 50 meters leading to a view of Akev Wadi. Walking along this narrow edge was both a thrilling yet terrorizing experience. If you are at all clumsy like me, be very careful! It’s a straight downwards fall if you do a trip. No fence nor safety net to speak of!
 The ledge of the cliff we had to walk along. Pay attention to the path on the right side!
Continue on the trail down to the signpost and climb down the ledge with the help of metal footholds. Turn right and walk for 50 meters… Viola!
You find yourself at a natural spring you can swim in.
At this point, we opened our backpacks and had our packed lunch plus a snack. We decided not to take a dip because the bottom was very slimy and dark. However, there were other people swimming in it to cool off.
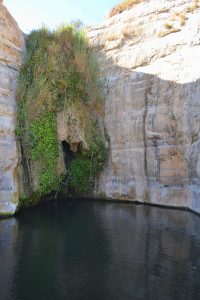 The natural water spring to take a cooling dip in.
Once you finish your break, walk back the direction you came from. Don’t climb back up but follow the blue markers going straight. You will reach the parking look and a jeep road in a few hundred meters. We were told you can try hitchhiking back to where you parked your car, however, we only saw jeeps heading the opposite direction. It wasn’t until we were only 1km from our car did we run into a group of jeep tours heading in the same direction. We decided to tough it out and finish the complete hike ourselves. The jeep drivers are super friendly. They stopped to check we were ok and see if we had enough water to finish our hike.
 The final stretch of our hike. Boyfriend’s celebrating the end already!
There you have it! We made it back to our car where we quickly got our butts on the road to return the car to Tel Aviv. But not before we took a short but well worth detour to Beit Guvrin-Maresha National Park.
Friendly reminder:
- Bring enough water. About 3L per person
- Use and reapply Sunscreen throughout the day, I got sunburnt quite quickly
- Bring a hat!! The sun can get real strong once the day starts
- Chapstick! I personally needed to use one with SPF since the sun really dried out my lips and it tends to give me cold sores
- Hiking shoes! The trails in Israel are usually unpaved and uneven. Rugged terrain (which are the best to hike right?!)
- Thin windbreaker. If you start hiking right around sunrise and around sunset the crater area can get a tad windy
All I can say is: Don’t put off a trip to Israel any longer. It is a country you shouldn’t miss if you are at all into beaches, nature, hiking, culture and/or history! Go for an amazing hike in Mitzpe Ramon, Israel asap!